How to configure AWS credentials using IRSA
IAM Roles for Service Accounts (IRSA) let Radius deploy and connect to AWS resources without long-lived credentials by assigning an IAM role to the Radius Kubernetes service accounts. This guide creates the IAM role and registers it as an AWS credential in the Radius control plane.
Step 1: Create IAM role
To authorize Radius to connect to AWS using IAM Roles for Service Accounts (IRSA), assign IAM roles to the Kubernetes service accounts used by Radius. Create an IAM role and associate it with a Kubernetes service account.
In the AWS Management Console, open Identity and Access Management (IAM) and create a new role.

Select
Web Identityas theTrusted entity typeand enter the cluster’s OIDC URL as theIdentity Provider.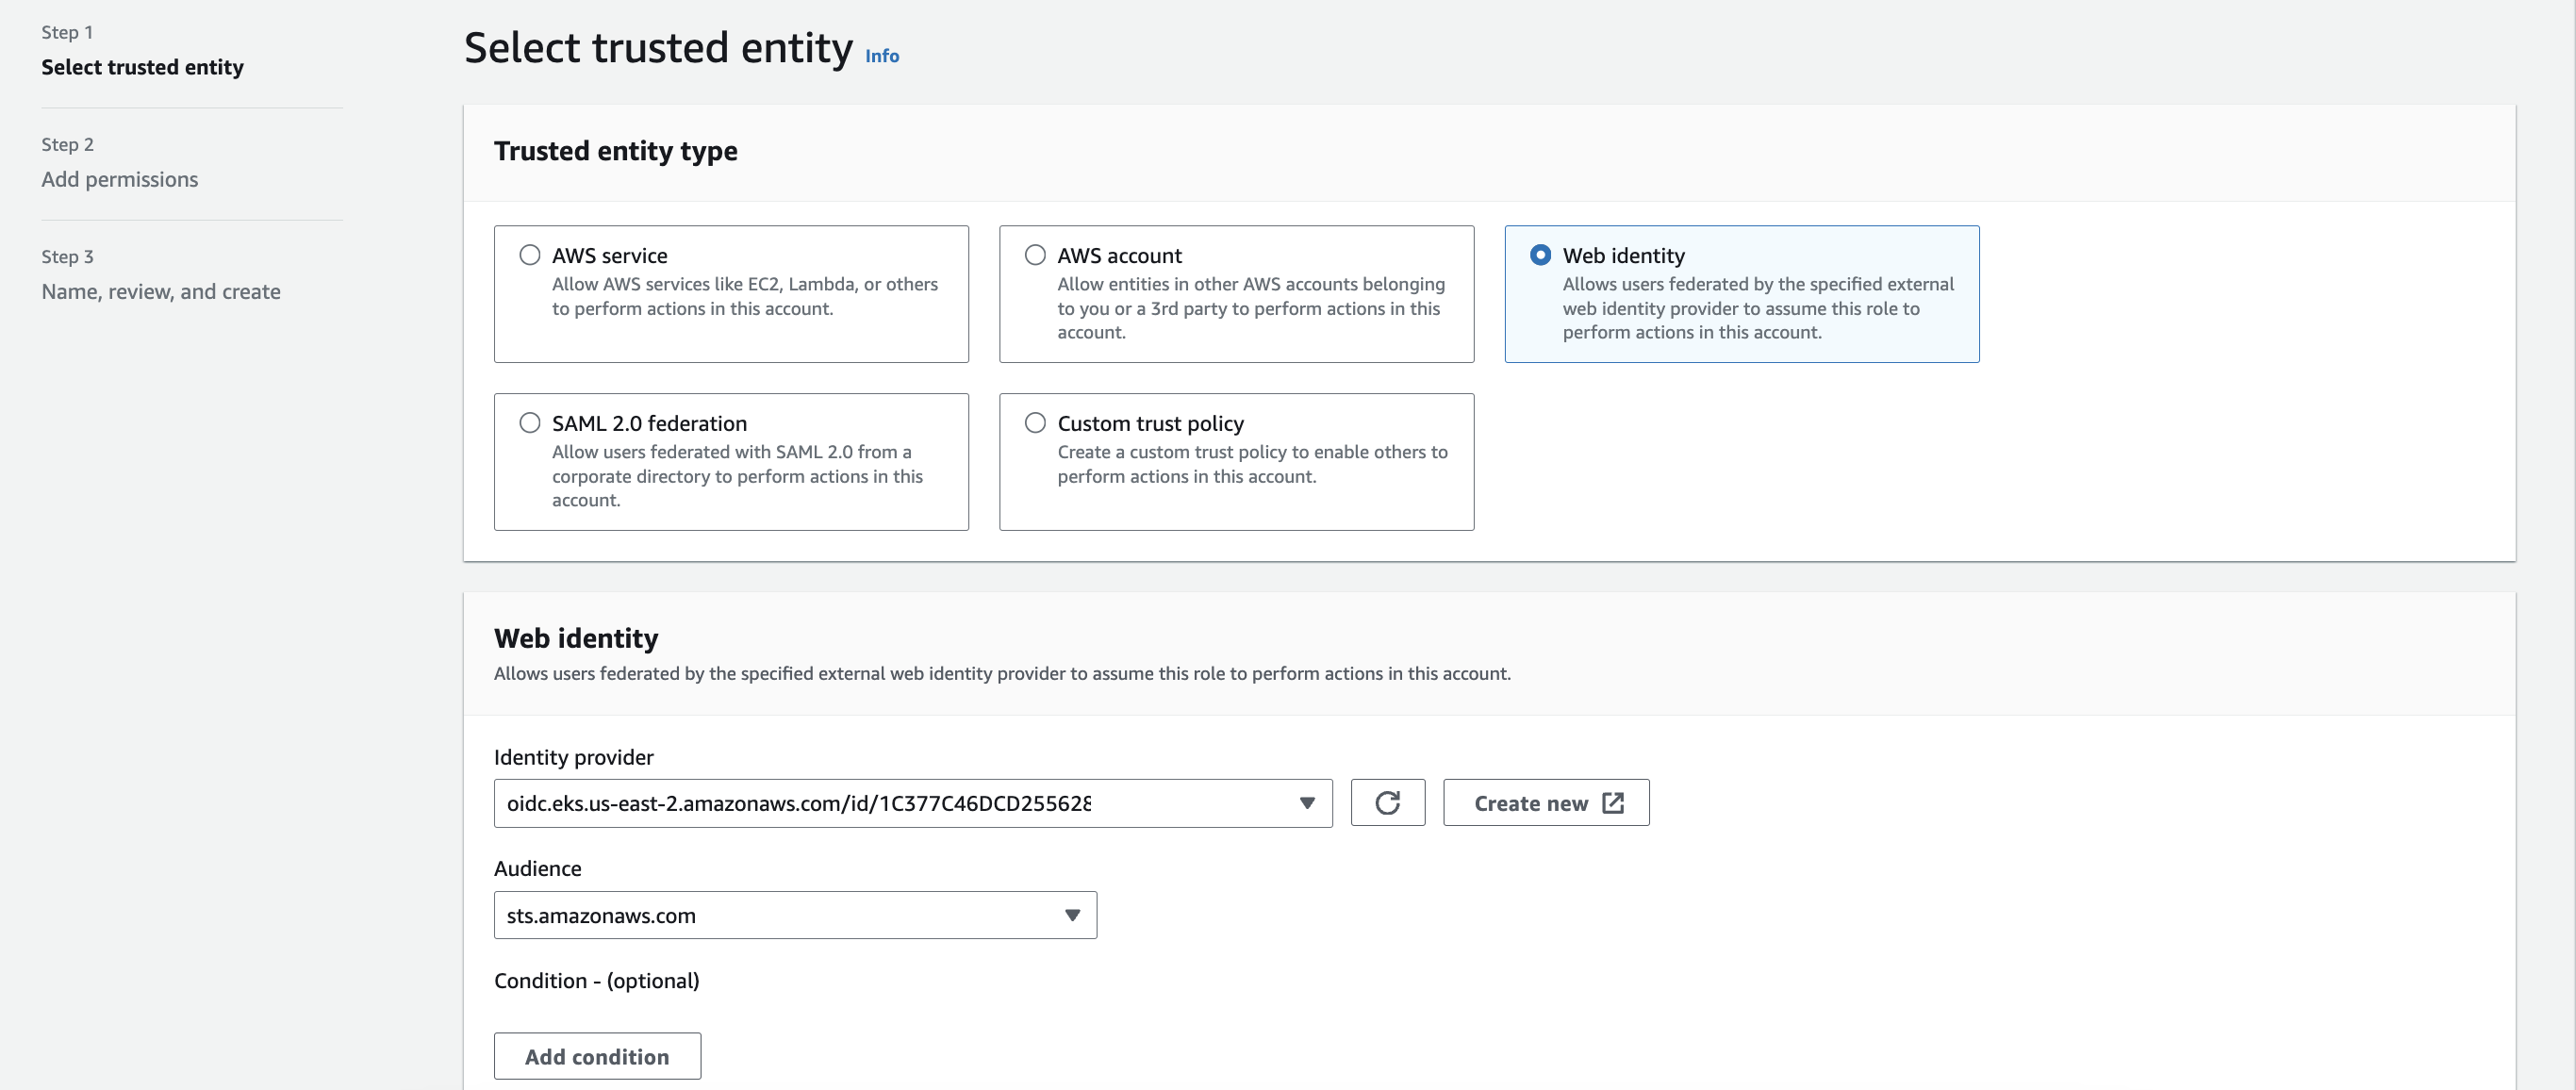
Attach an IAM policy that grants the permissions Radius needs to deploy your resources.
Enter a role name and create the role using the default trust policy.
Update the trust policy to match the format below.
{
    "Version": "2012-10-17",
    "Statement": [
        {
            "Effect": "Allow",
            "Principal": {
                "Federated": "arn:aws:iam::<account-id>:oidc-provider/<oidc-url>"
            },
            "Action": "sts:AssumeRoleWithWebIdentity",
            "Condition": {
                "StringEquals": {
                    "<oidc-url>:aud": "sts.amazonaws.com",
                    "<oidc-url>:sub": "system:serviceaccount:radius-system:ucp"
                }
            }
        },
        {
            "Sid": "Statement1",
            "Effect": "Allow",
            "Principal": {
                "Federated": "arn:aws:iam::<account-id>:oidc-provider/<oidc-url>"
            },
            "Action": "sts:AssumeRoleWithWebIdentity",
            "Condition": {
                "StringEquals": {
                    "<oidc-url>:aud": "sts.amazonaws.com",
                    "<oidc-url>:sub": "system:serviceaccount:radius-system:applications-rp"
                }
            }
        },
        {
            "Sid": "Statement2",
            "Effect": "Allow",
            "Principal": {
                "Federated": "arn:aws:iam::<account-id>:oidc-provider/<oidc-url>"
            },
            "Action": "sts:AssumeRoleWithWebIdentity",
            "Condition": {
                "StringEquals": {
                    "<oidc-url>:aud": "sts.amazonaws.com",
                    "<oidc-url>:sub": "system:serviceaccount:radius-system:dynamic-rp"
                }
            }
        }
    ]
}
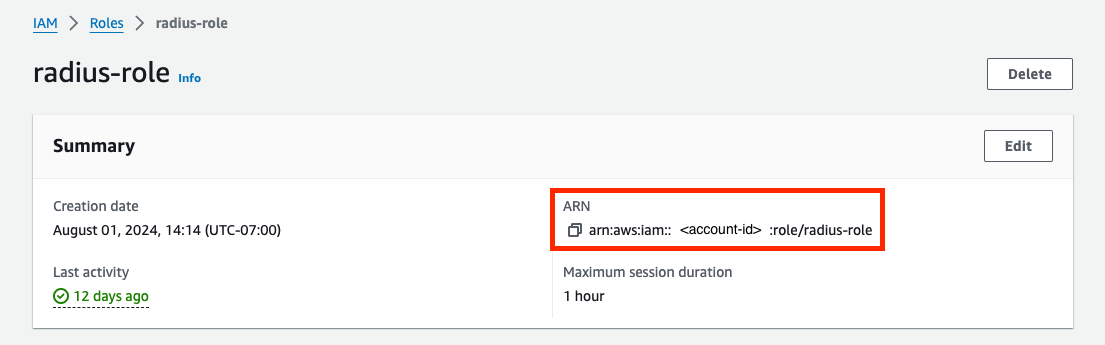
Record the IAM role ARN.
Step 2a: Interactively via rad initialize
If Radius has not been installed already, rad initialize --full can be used to interactively install Radius and configure AWS IRSA at the same time.
rad initialize --full
Follow the prompts:
- When prompted with “Add cloud providers for cloud resources?”, select Yes.
- Select AWS, then IRSA.
- Enter the IAM role ARN recorded in Step 1.
- Enter the AWS account ID and region to use for the
defaultEnvironment.
Step 2b: Manual configuration
IRSA requires the Radius control-plane pods to mount a projected AWS web-identity token. If Radius has not been installed, enable it by installing Radius with the global.aws.irsa.enabled Helm value set to true:
rad install kubernetes --set global.aws.irsa.enabled=true
If Radius is already installed, enable IRSA with an upgrade instead of reinstalling. This restarts the Radius control plane pods with the token mounted:
rad upgrade kubernetes --set global.aws.irsa.enabled=true
Then create the AWS credential in the Radius control plane with rad credential register aws irsa:
rad credential register aws irsa --iam-role myRoleARN
Radius will use the provided role ARN for all interactions with AWS.
Step 3: Update existing Environments
If you have existing Environments, you must also update your Environments with your AWS region and AWS account ID:
rad environment update myEnvironment \
  --aws-region myAwsRegion \
  --aws-account-id myAwsAccountId
This command updates the configuration of an environment for properties that are able to be changed. For more information visit rad environment update.
Next steps
Once AWS or Azure credentials are configured, set up access to the Radius Dashboard.
Next step: How to configure access to the Radius dashboardFeedback
Was this page helpful?
Glad to hear it! Please feel free to star our repo and join our Discord server to stay up to date with the project.
Sorry to hear that. If you would like to also contribute a suggestion visit and tell us how we can improve.